Overview and Preview
Edit your public storefront: visual editor, pages, and the Store settings hub.
Your public storefront is designed in the visual editor. Backend options (status, taxes, emails, apps) live under Store in the seller sidebar.
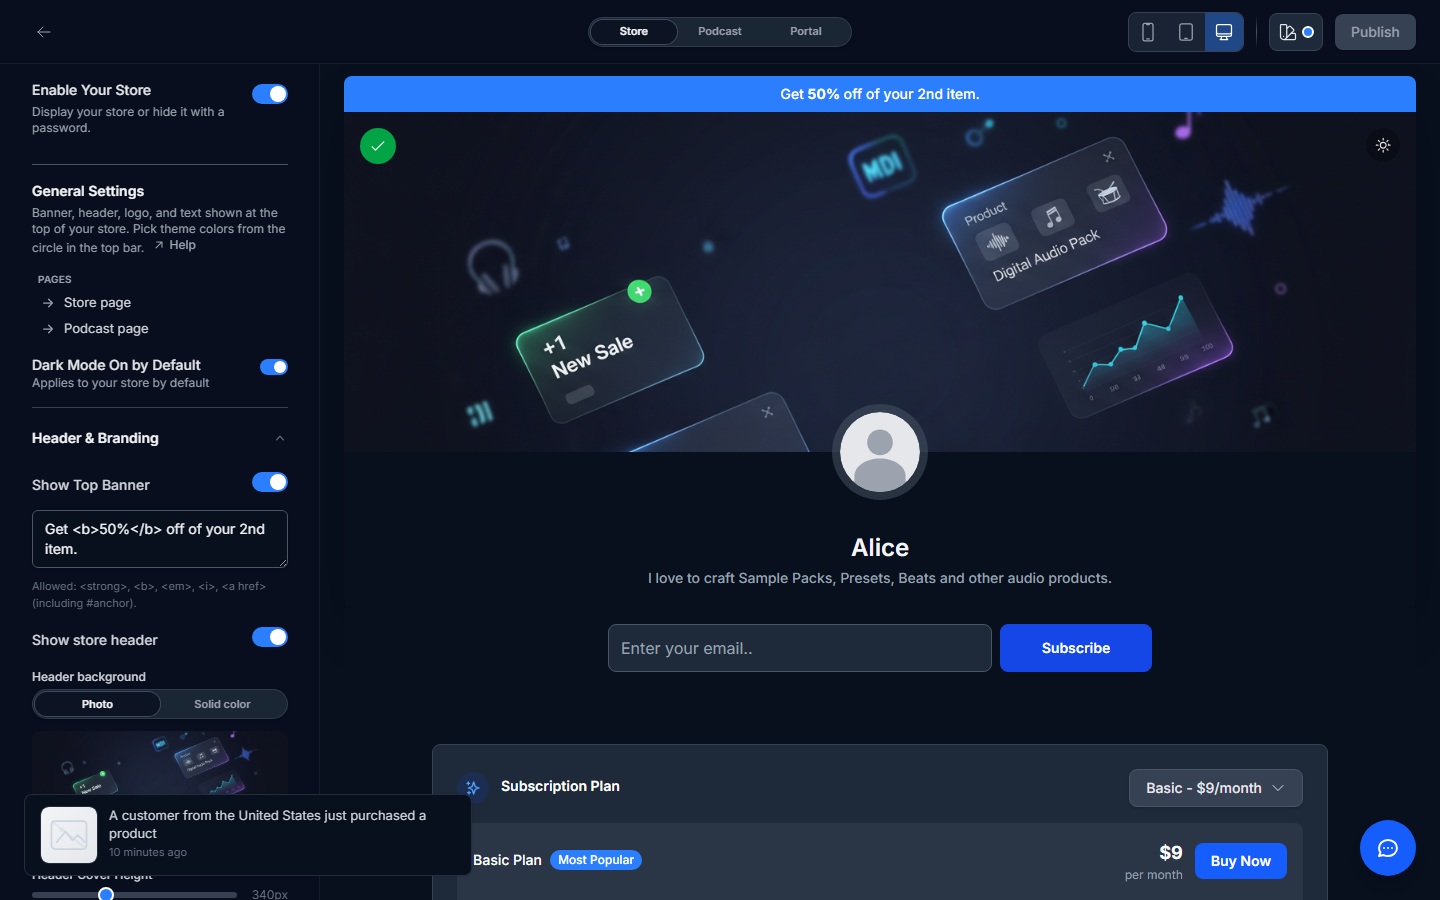
Open the visual editor
From Store in the seller sidebar, click Preview (or open your store URL with edit mode). You get a full-height editor: left panel for settings, center canvas for what buyers see.
Editor sidebar
- Pages: jump between the Store page (home) and optional modules such as Podcast when installed.
- General Settings: dark mode default, header & branding (banner, cover height, logo), and related layout toggles.
- Theme colors and Publish live in the top bar (not the left list).
Top bar
- Store / Portal (and Podcast when enabled): switch which surface you are editing.
- Device previews: phone, tablet, desktop.
- Theme: brand color palette.
- Publish: save editor changes to your live storefront.
Seller Store settings hub
Back in the dashboard, Store opens the settings hub with five tabs. Use these for operations that are not visual layout:
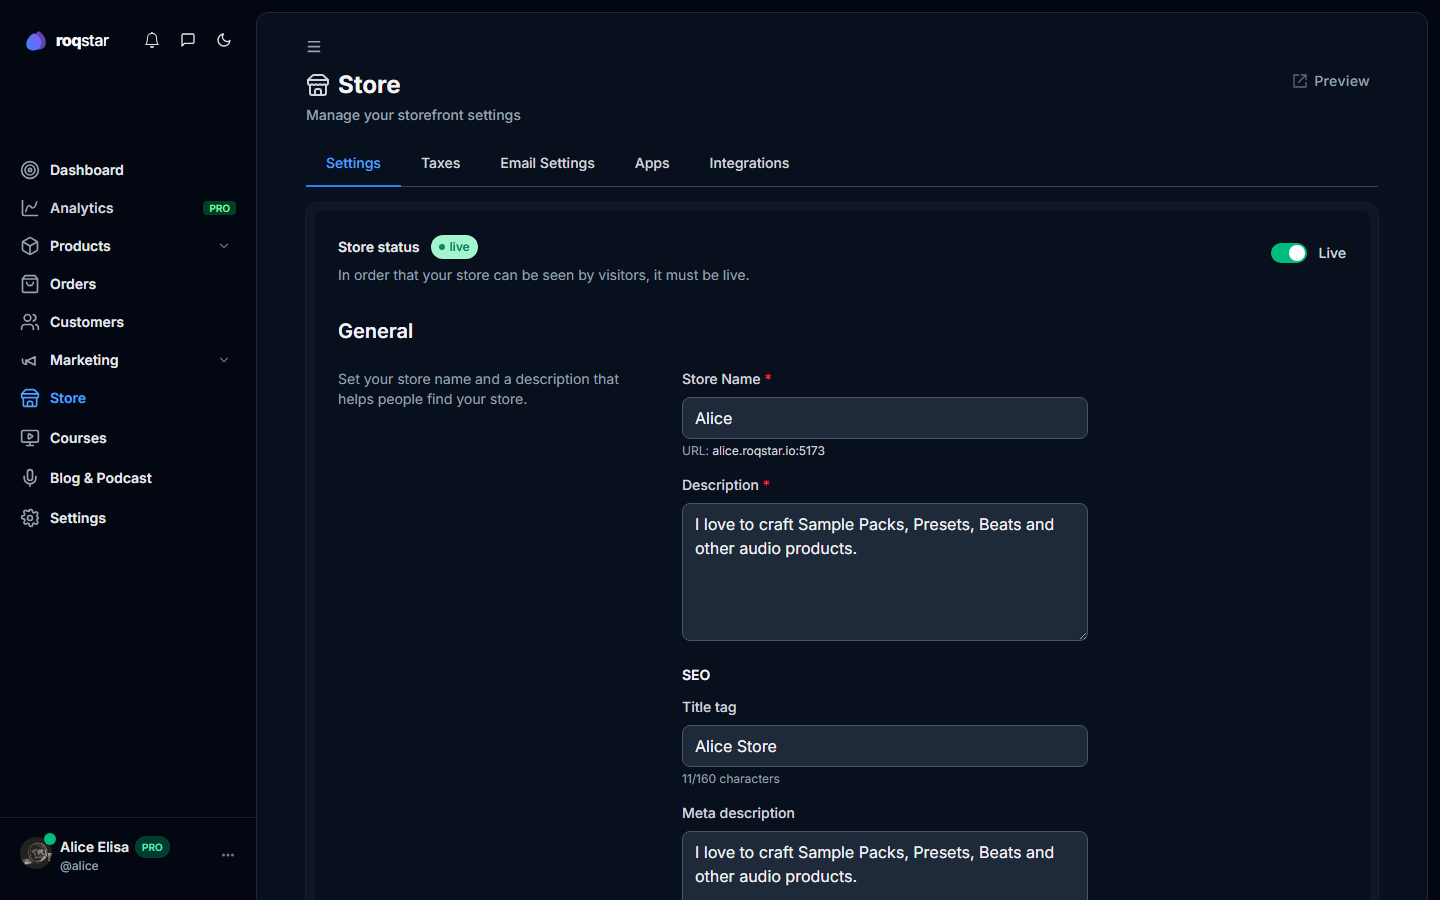
- Settings: Live/Offline, name, SEO, custom domain, password gate, support contact. → Settings
- Taxes: VAT and country rules. → Taxes
- Email Settings: transactional templates. → Email settings
- Apps: Live Chat, Reviews, FAQ, and more. → Apps
- Integrations: ESP connections. → Integrations
What buyers see
After you publish, walk the buyer path (home, checkout, blog) from Preview. Checkout details are also in the Checkout guide.
Going live checklist
- Store status = Live under Store → Settings.
- At least one published product with files.
- Stripe Connect complete (Settings → Payments).
- Active subscription (Settings → Billing).